

Alright, Mom, this post is for you. Oh, and everyone else who has ever had me cut out their quilt pieces for them because they are cutting pieces one at a time. Oh, and you newbies who wanted me to walk you through the block of the month one step at a time? I told you I was going to start at the beginning. Just because I love you. xoxo
Let’s talk about rotary cutting.
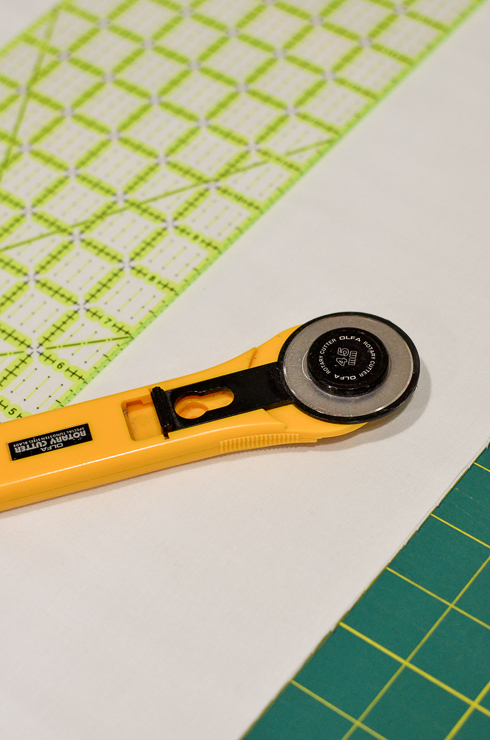
First things first, you’ll need a rotary cutter (mine is 45mm), an acrylic ruler, and a self-healing mat to protect your surfaces. For other tools you’ll need to start quilting, check out this post I wrote a couple years ago.
You’ll need some fabric you want to cut up, too.
Alright, chickadees, here goes.
There are a couple things you want to keep in mind when you’re using a rotary cutter, which are obvious, but crucial. First, that little blade is SHARP. Seriously people, you can lose parts of digits with that little beggar. Be careful. Please. Second, you should be using your rotary cutter on a clean, level surface that is high enough for you to work without hunching over and not so tall that you’re scrunching up your shoulders. For most people, that’s counter height, approximately 36″. Using the right height counter makes it possible for you to put the right amount of pressure on the ruler without hurting yourself or shifting the ruler because you’re in an awkward position. Third, always, always, ALWAYS put the guard up after EVERY cut, and keep it off the floor. Just make it a habit. If you don’t, you risk kicking that little blade and really doing some damage to a toe. Ask me how I know.
Now that those are out of the way, some tips and tricks for using a rotary cutter.
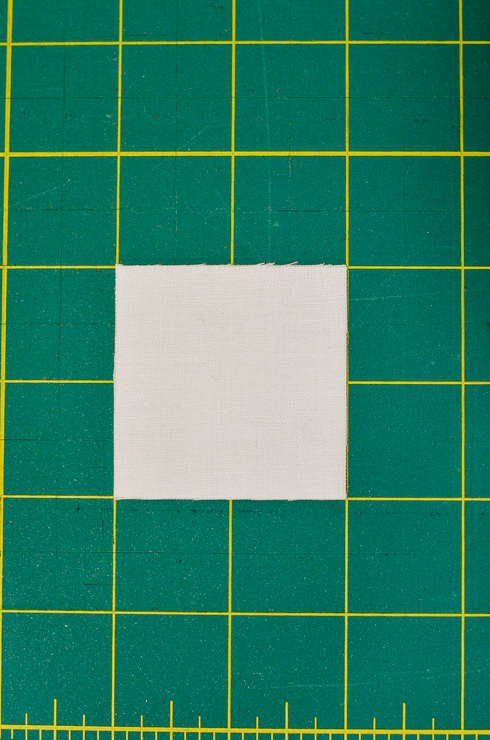
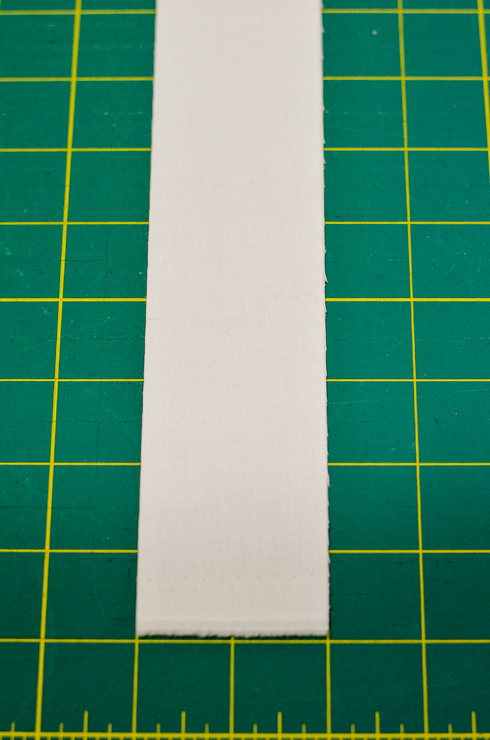 To start, you’re going to want to square up your fabric.
There are multiple ways to do this. I typically fold the fabric selvedges together and line the selvedge edges up with a horizontal line on my cutting mat. I then trim the adjacent edge as needed at a 90 degree angle to the selvedge. This makes the rest of your cuts more accurate and also helps you avoid a peak in the middle of your long strips. Always make sure you are cutting square to the fold and the selvedge. If you are cutting multiple strips, you will probably have to re-square your edge after multiple cuts.
Anytime you can, cut vertically.
Meaning, lay the fabric out so that you can make your cut starting close to you, and moving the rotary cutter away from you. (Always move it away from you, just like cutting with scissors.) If you are right handed, you’ll want to position yourself so that you are just a little bit to the right of the place you are cutting. This gives you maximum visibility of both your ruler and your blade. This is crucial for both accuracy and safety. Horizontal cuts are much harder to accommodate accurately and severely limit your visibility. Consider turning your mat or fabric instead.
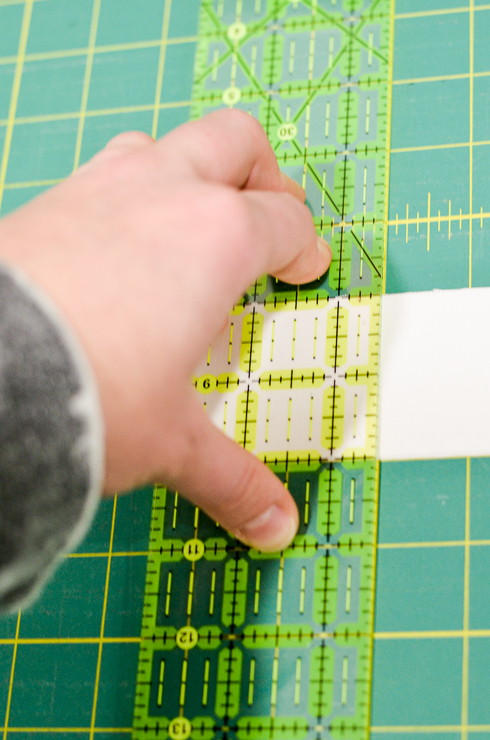
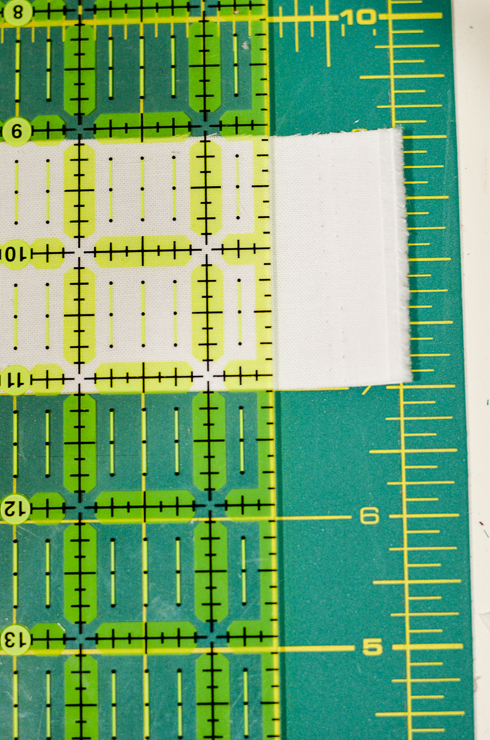
When positioning your ruler for a cut, be accurate, but be generous.
Put your ruler on the left edge of the appropriate line on your cutting mat–remember, the blade is thin, but still takes up some space too. Positioning your ruler this way will insure you aren’t cutting your pieces just a hare too small–which in many projects can really add up. Check to make sure that all the lines on the ruler are also aligned, there should be no ruler lines intersecting cutting mat lines unless you are cutting on an angle on purpose. Instead, ruler lines and mat lines should be either stacked on top of each other, or parallel to each other.
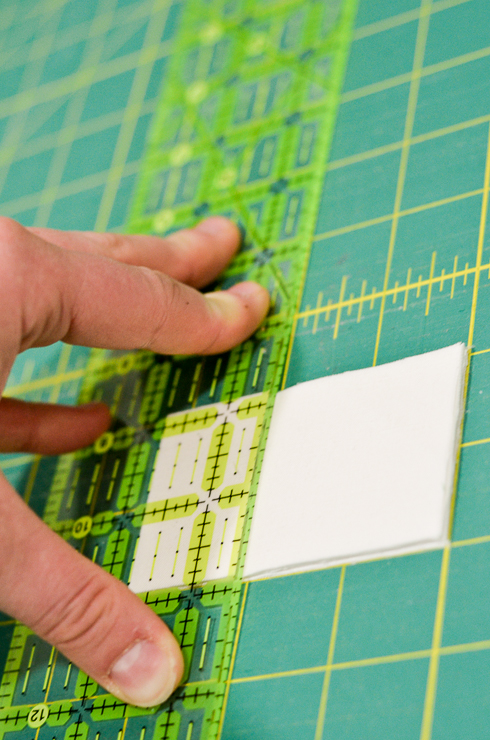
Now that your ruler is positioned, you’ll need to hold it down securely.
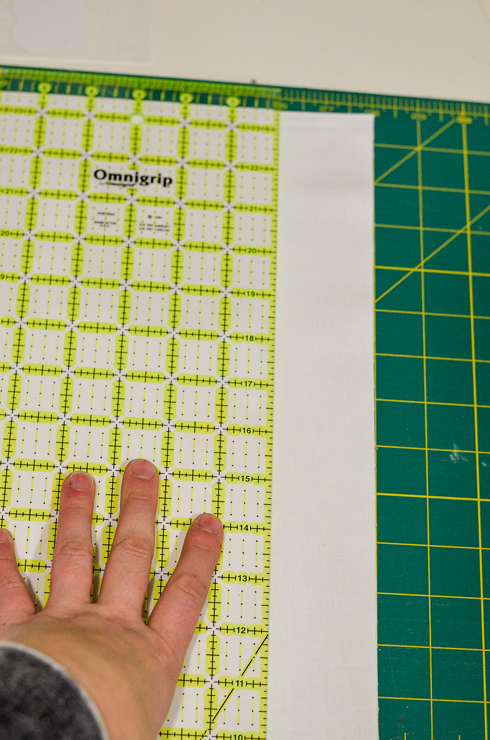
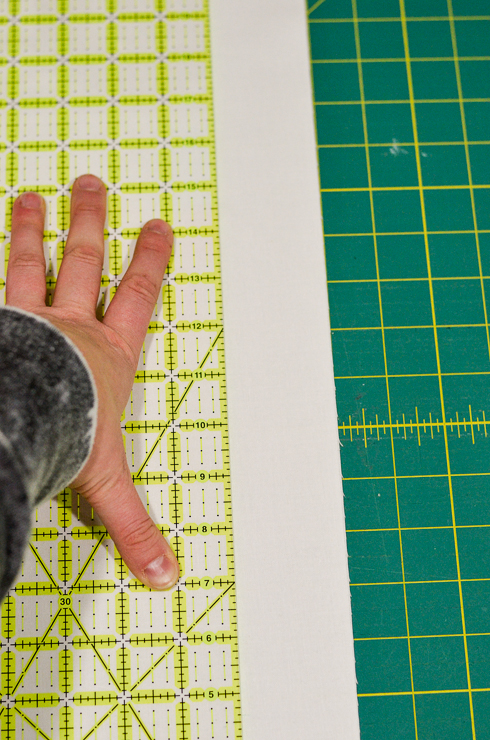
Resist the urge to put your left (right for lefties) hand flat on the ruler to hold it. When you put your hand flat, you tend to put diagonal pressure on the ruler causing it to slip forward and away from you, resulting in a crooked cut. It also creates a single pressure point which allows the ruler to pivot. Think a fulcrum in a seesaw. In addition, a flat hand position causes your thumb to be quite close to the edge of the ruler, and many people spread their hand out more and more as they try to put pressure on the ruler, resulting in cuts to your thumb. Instead of the flat hand, try making a claw shape out of your hand, and bending your wrist so that your arm is perpendicular to your hand. This places direct downward pressure on the ruler, making slips less likely. In addition, spreading your fingers this way and using your fingertips provides several pressure points on the ruler, which prevents a single pivot point and adds security.
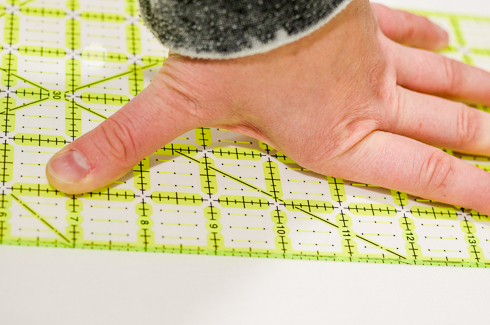
You will notice in the pictures that my palm is always off the ruler and my thumb is always parallel to the edge, even in extreme cases where I am using both my fingertips and knuckles for pressure.
Position your hand in the middle of the ruler.
Always try to place pressure on the whole ruler, not just one point. You don’t want any space between the mat, the fabric, and your ruler, because the fabric will slip in and out of alignment as you push it with the rotary cutter. Be sure your fingers are all clear from the edge. If you are making a particularly long cut (18+ inches), you may need to move your hand, position it first at about the 1/3 mark, and again at the 2/3 mark. Stop cutting while repositioning your hand, and make sure the ruler is still perfectly aligned and hasn’t been bumped in transition before you resume cutting.
Cutting multiple layers.
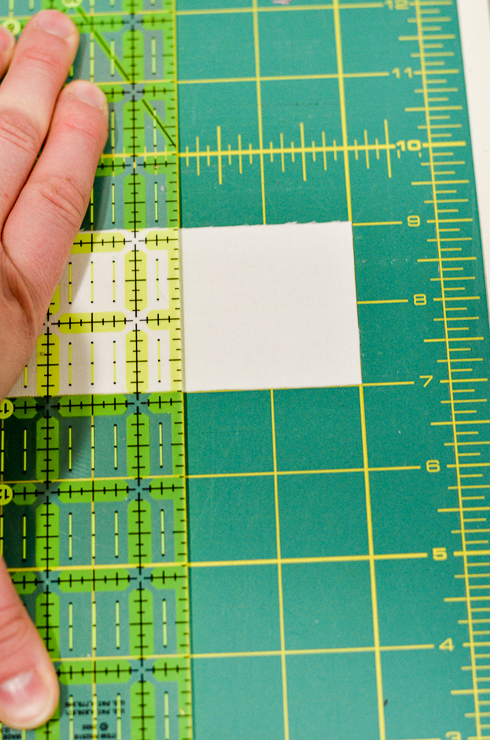
One of the great things about rotary cutting is that you can cut quite a few layers at a time (I have cut up to 10 layers of regular quilting cotton with a fresh blade.) While this can be a huge time saver, it can also make quick waste of your fabric if you make a mistake. I have found that my biggest mistakes come when my blade isn’t sharp enough, or I don’t put enough pressure on my ruler. When you’re cutting through several layers, like cutting squares from strips, for example, here’s what happens. You place your ruler on top of a stack, and suddenly, you’ve created a pivot point because the height of the stack of fabric lifts the ruler enough that it doesn’t touch much of your rotary mat. Like we discussed earlier, a pivot point causes ruler movement. So, in this case, your best option is to position your hand so that your fingers are on either side of the stack, if it’s a small piece, so you can press the ruler all the way down to the mat, or if the piece is larger, use extra downward force centered on the piece–that’s when I tend to push my claw hand down to the point where my knuckles are also on the mat.
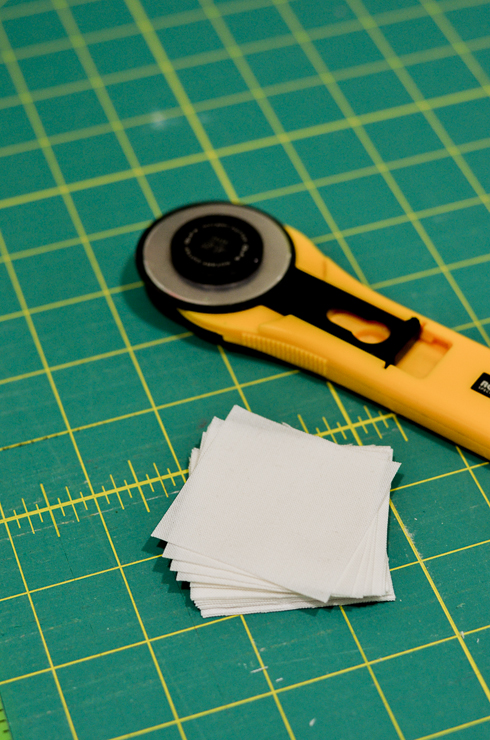
In these instructions, I’m going to walk you through cutting squares from multiple strips.
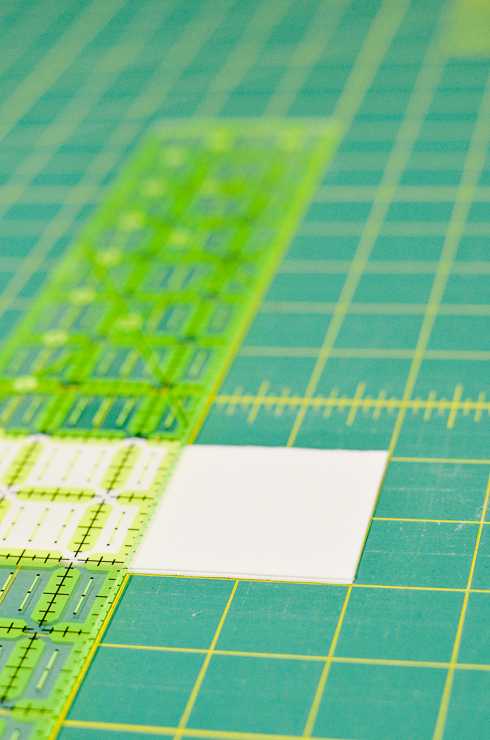
First, position your strips horizontally so that you can cut vertically. Stack strips precisely on top of each other. Trim off the selvedge edge.

Move your ruler to the appropriate measurement line, press your fingers down on either side of the strip.
Once everything is aligned correctly, make one quick, firm cut. Leave the strip stack and the freshly cut squares where they are. Move your ruler to the left and reposition it for a second cut.
 Avoid moving anything until the entire strip has been cut into squares.
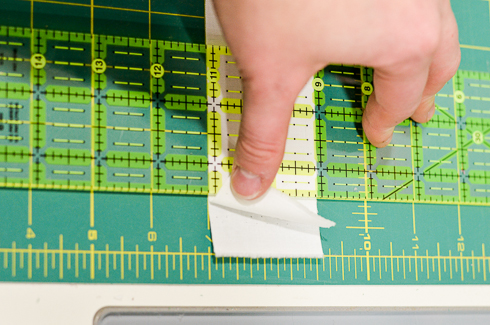
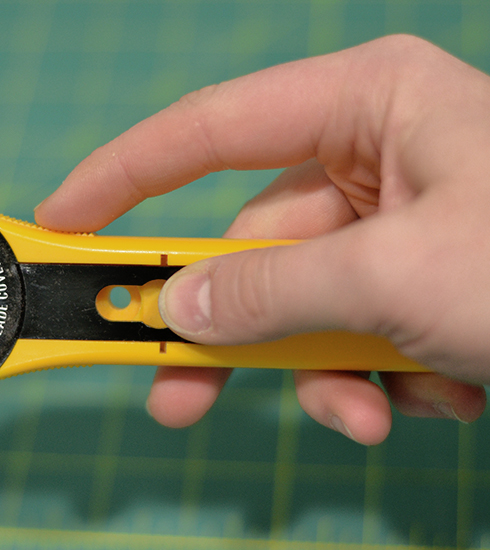 Hold the rotary cutter for precision.
The best hand position for your rotary cutter should allow for precision of movement, stability, and top-down pressure. This means, no gripping the handle in your fist. I like to position my hand as shown, using my pointer finger along the top for perfect pressure, my thumb along the side to avoid left and right wobbling and quick guard access, and my other three fingers along the bottom for counter pressure.
Finally, be fast and firm.
Once you have squared up your fabric, aligned your ruler, and positioned your hand, the final step is to actually make the cut. In a lot of ways, this part is the easiest, and yet, most people have a really hard time with it. Your most accurate cut is going to come from direct, firm pressure on the rotary cutter and a fast, decisive cut. Don’t go slow, this gives time for the fabric to move and shift as you leisurely roll along. Don’t seesaw back and forth along your ruler, this shreds your fabric and kills your accuracy. If your blade is sharp, just one firm fast cut ought to do it. If your blade can’t make the cut in one pass, either you aren’t using enough pressure or your blade needs to be replaced. Slow, jerky movements and deep gouges in your rotary mat are signs of too much pressure.
 As you gain experience, you will be able to cut more layers, and even several stacks of multiple layers at a time. But that’s a topic for Rotary Cutting 102. :)
Alright my friends, go and cut those block of the month squares and rectangles with your new found knowledge! Questions and tips in the comments of course, and if you left a question on the last post, I’ll be answering those today in the comments. Be sure to check back.
xoxo
April
PS Up next, a quick break to show off my finished Scrappy Tripalong quilt, a fabric bleeding mishap, and Piecing 101.
Thanks! I am going to try these tips and maybe, just maybe, I won’t hate cutting out fabric. ;)
Thank you!
Awesome tutorial! So proud of you!
Very good tutorial with lots of information presented in a logical and clear manner. I don’t use the selvage to square off my fabric because I frequently find that it is not straight. Instead I fold the fabric in half on grain and square to the fold. Thank you for talking about safety with the rotary cutter, I also use a cut resistant glove on my ruler hand, and I keep a package of bandaids in my cutting table.
Thanks for the great suggestions!
I am so happy to have found your tutorial 101. I need to find out everything that I can before I take on new projects. I have always wanted to quilt and I told everyone at work before I retired that I was going to make my family quilts. Well I have been retired for four years now and I would like to get into it. I do feel that it would be a perfect project for winter. I don’t want to miss any of your suggestions and tutorial’s. If you could send me an e-mail on your next lesson I would truly appreciate that. Thank you so much. Bobbie
Quilting is great in the winter time! (It’s great in the summer time too. :) good luck getting started! Xoxo
Thank you. A confidence building tutorial. My rotary cutter is about 10yrs old and has been used about as many times. Not my most favoured accessory. I have visited many posts looking for someone with knowledge but above all who actually explains things at grass roots for when I retire and ‘have the time’ to quilt. Found you, thank you. Looking forward to reading your future posts. Lilijana
I have a mail order re: getting new blades for your rotary cutters – on a trade in basis. If you are interested – email me and I will send you the address and info with you. ….
no gimmicks – on the up and up and lots of my quilty friends use this……
S.
Yes, please, I’d be delighted to get info on trading in my used blades!
Thank you for your tutorial!
Where can I send my old blades for trade?
Is this being done in 2017?
Are you still taking used blades? Would like more information.
Thank you!
would like to have the adrress to send in used blades.
Please send me the address for trading in used blades.
Loved this tute. Even with a single strip I make all those mistakes. As someone commented above I find all fabrics have wonky selvedges – the ones I get here and so never dare go for multiple cuts. learnt enough here to try next time.
You’ll have to evaluate your own fabric and selvedges, and decide. There are lots of other ways for sure…but this tutorial was already long enough! Something to cover in Rotary Cutting 102! :)
I noticed that you use your mat to measure. I use my ruler. Besides being more accurate, using the ruler to measure moves the cut to different places on the mat and keeps it from getting a groove along the lines and needing to be replaced sooner.
Hi Mary! I use both methods and find my accuracy to be consistent either way. I don’t generally align my fabric edge in the same place every time, so I avoid making cuts in the same place and the wear and tear that comes with that. Definitely use what works best for you, though! Thanks for commenting!
I agree with Mary Honas – Rulers are generally more accurate than the lines on your cutting mat. It is well worth learning how to properly use a quilting ruler. It took some thinking and getting used to in the beginning, but now I won’t cut without a ruler.
Hi Carla! I agree, it’s worth it to learn about your tools! Like I mentioned to Mary, I use both the mat and the ruler to measure, depending on the circumstance. It’s served me well. :) thanks for commenting! Xoxo
Excellent. I found you by Googling about how to keep a ruler from slipping.
This was just what I needed. Not only how but why. I have heard about using finger tips but not why. I liked how you showed both finger tips but also the fingers “laying down” but keeping the palm off the ruler. Thanks so very much for your help!
I’ll be looking at more of your blog!
Tips for cutting denim with the rotary blade? I’d like to start working in a blue jean quilt soon, and if this could save me cutting time I’d really appreciate it.
Brilliant tutorial. Thanks April. Love your patterns too – I’m about to order he zigs, she zags – brilliant name too!
THE *VERY* best tutorial I’ve seen, thank you.
But before you get started on your next craft project, you will need to be well equipped.
Going back to my original statement about how there has not been a
new technique developed for thousands of years, I would like to explain that and expand upon it a little bit further.
So if possible, you should join one program at a time and put all your efforts in promoting it.
Thank you I’m learning a lot,thanks for making it so easy to understand.
Great tutorial, very well explained. I just started using a rotary cutter, this is very helpful information for everyone
Ugh I hate cutting fabric! I have never puts quilt together out of fear and laziness! I do have all the fabric to do so but the cutting of all those pieces… Now I am motivated to do it so I can stop staring at my machine only table!!! Lol
add to email list
I worked at a fabric store for awhile and when you have to cut hundreds of kits you learn some short cuts. I never used the mat. I would square up fabric and then turn it the other direction and use the ruler. It was a little more difficult in the beginning but now it’s second nature. Plus the fabric you are cutting is under your ruler which gives you a more accurate cut.
Thank you! I’m not a quilter, but I’m new to the rotary cutter and I’m terrified of the thing, so your directions are more than welcome.
On the other hand, now I understand why the fabric store sells so many pre-cut squares!
Great tutorial. My 67-year-old hands (especially the thumbs) can get pretty tired, so I sometimes use a suction handle on my big rulers. It seems to help. Thanks again for a wonderful tutorial.
Thank you
I have deep gouges in my cutting mat…. yes pressing to hard…. no wonder I am exhausted after cutting lol
Great tips! I will try them.
Great tutorial. My mat has lots of cutting lines. I have seen a post on how to repair a Mat but don’t think it will work on cutting lines. I guess that means a new mat.
Very good information and for stressing the importance of keeping fingers away from the blade. When I first started using the rotary cutter I made the mistake of saying…oh its a small cut and I didnt use a ruler…we took a trip to the emergency room and 6 stitches latter I am now extremely carefully. My cuts have always been on the small side so from reading your post I realize that I need to give myself the extra room to accommodate the blade size. Thanks for all the information and the great tutorials.
Thanks for the great tutorial. I am relatively new to sewing plus self taught. I learned a great deal from blog tutes like yours. I bought a rotary cutter when I first started sewing but I didn’t have the proper instruction on how to use it. I tried using it a few times but I got frustrated & threw it in a drawer where it still lays un-used. With your instruction I believe I can learn to use it now. Thank you & God bless.
I hope you have a post on squaring fabric soon. I can’t cut a piece that’s straight on all sides. They are always wonky and crooked and the more I try to square the piece the worse it gets until it’s to small to use. I use the ruler and mat and it’s still off. You said to square the whole fabric first using a ruler & mat using a 90 degree angle. I don’t understand angles at all. If you don’t do a post on squaring, could you please email me as how to do it? Could you use pictures showing how to lay the fabric on the mat & how & where to cut. Also how to fold the fabric before putting it on the mat. I’m one of those who has to see it visually to understand it thoroughly after reading the instructions. I am so hoping you can help me. I’m so frustrated not being able to get the fabric square to get a square cut that I’m ready to give up sewing altogether. Thank you & God bless.
I just found your tutorial and am so glad to see it. I have been cutting using the mat ever since I began quilting. I have been told that this is never accurate and no professional quilter would do such a thing. So glad to see I do not have to live in that box. Loved the hints.
Wow! I have read many tutorials on how to use a rotary cutter, and this one is the best ever! Thank you for your clearly written explanations. It has answered many of my questions. Also, I love your site…It is definitely one of my favorites.
I’d like to have the address to send in my blade for a trade,please.
Love to have the address for blades being refurbished.
Thx
I would also like the
address for used blades. I just found your lesson for cutting and loved it but I don’t understand the 90 degree cut. Would you help me with that.
I’m not a quilter, but I sew. This tutorial addressed every mistake I’ve been making. Thank you for posting it, I just wish I found it sooner
Thank you! Thank you! Thank you! Best tutorial I’ve read. Just getting into quilting and make ALL those mistakes, frustrating. Now I will try a better way. Your tutorial is so direct and well stated, no guessing what you mean as you have great pictures too! I also read your appliqué tutorial and learned exactly what I needed to know….after I did a Father Christmas wall hanging quilt. I learned a lot from my experience, but the unanswered question for me was where that needle is to fall exactly. Your words and great pictures cleared that up. I had also wondered how to start to keep it from raveling without extra stitches on the appliqué. Thank you for that as well.
I’d love to see a tutorial on squaring up fabric
April, thank you for the thorough explanation & photos to go along with your tutorial. You have answered so many questions for me. You’re definitely my kind of teacher, your attention to detail is my language. ;)
I do have one question for you, do you starch & press your fabric before you begin? If so, do you press selvedge to selvedge with a crease in the center of those?
Thanks again!
OK, now after watching your tutorial, I might actually be able to go and use my cutter properly. I figured that it would be simple…everybody makes it looks simple. Bought one, brought it home, got out my cutting board (plastic) because that is what I had…it cut right through the cutting board…now it won’t cut anything else. I guess that did it in. Guess I will go try and change the blade and try again. It would be nice to have an easier way to cut…Beth