
 Don’t go running and screaming away, I promise this will be quick and painless. And for those of you who haven’t done much with applique, or machine applique, you’ll see this isn’t anything to be afraid of.
Here’s the thing about machine applique: with the right tools and techniques, it can be really, really easy. And if you’re one of those people that just cringe at the word applique, well, you’re not alone. I have a couple friends and family members that are right there with you. But I promise–it doesn’t have to be traumatizing. Lets do it. Here are 10 steps to perfect machine applique.
1. Start with a template
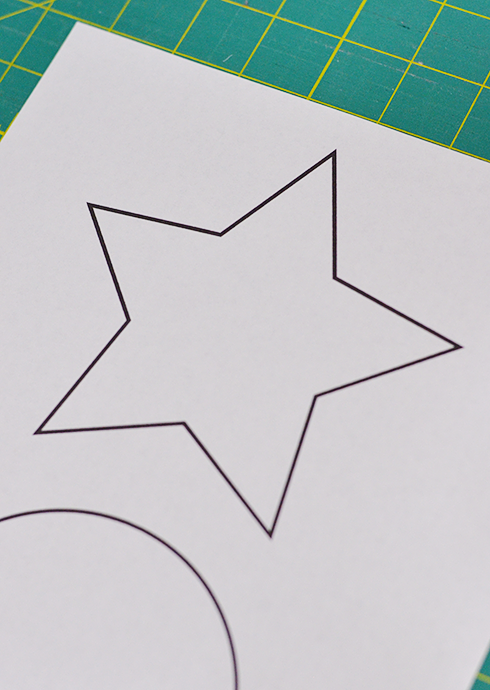
Unless you’re really, really good at freehanding it, it’s easier to trace a shape. Also, with this technique, if you want to applique letters, you’ll want the letter to go backwards on the template.

Trace the template on to the paper side of some fuseable webbing. Usually, I use Heat ‘n Bond lite, but I also really like featherweight–it doesn’t make the finished product stiff at all.
2. Cut around your shape, leaving some space around the line. Iron to fabric.
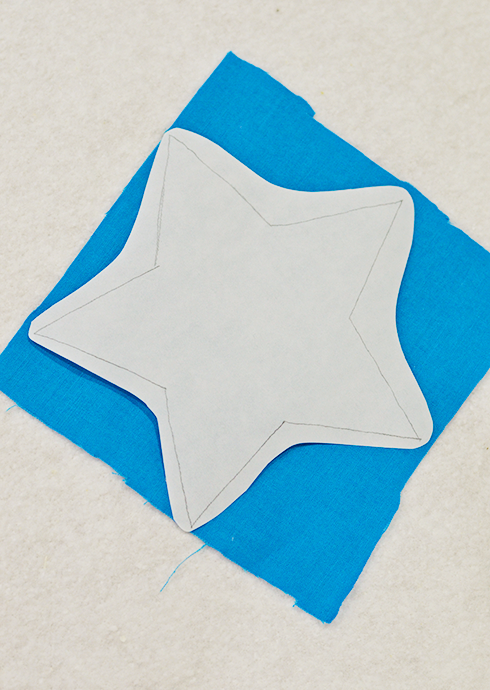
Place the paper shape shiny side down on the wrong side of your fabric.

Adhere the paper shape to the fabric according to manufacturer’s instructions. In my case, I used the “silk” setting on my iron for 2 seconds.
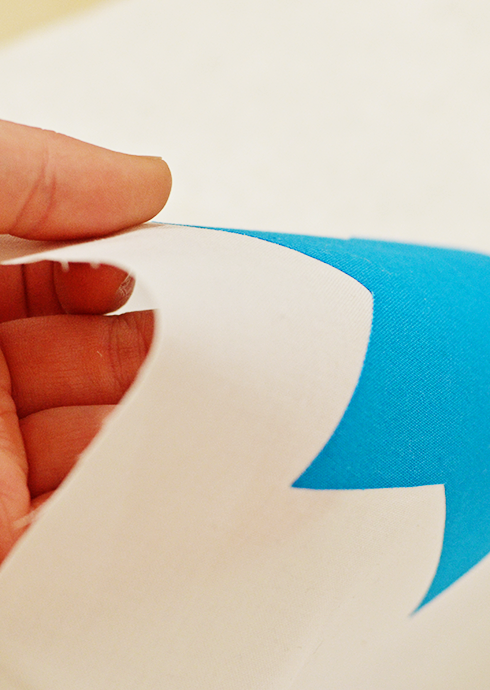
3. Cut out the shape on the line.

Peel the paper off the back of the fabric.
4. Iron the shape to background fabric, according to manufacturer’s instructions.
In my case, I used the silk, no steam setting for 10 seconds. Be sure not to keep your iron there too long, you run the risk of scorching the fabric or making the webbing not adhere as well. The shape should be stuck to the background well enough that it doesn’t lift or shift if gently manipulated.
5. Choose your thread.
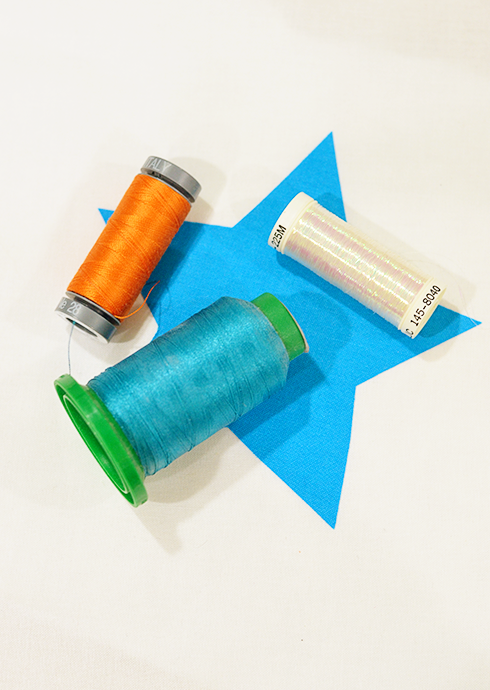
You have lots of choices when it comes to thread. I have used metallic, iridescent, matching, contrasting, even invisible thread. If you’re just beginning, I suggest using a thread that matches your shape. As you gain skill and confidence, you can move on to other threads–which can add a LOT of fun and visual interest to your project.
6. Start with a tacking stitch.
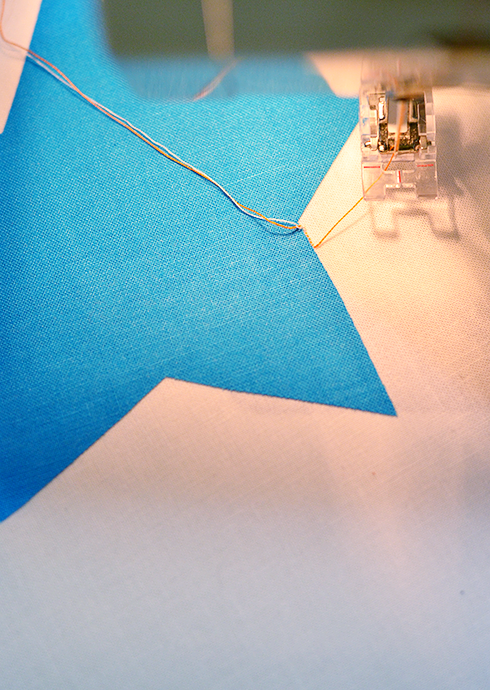
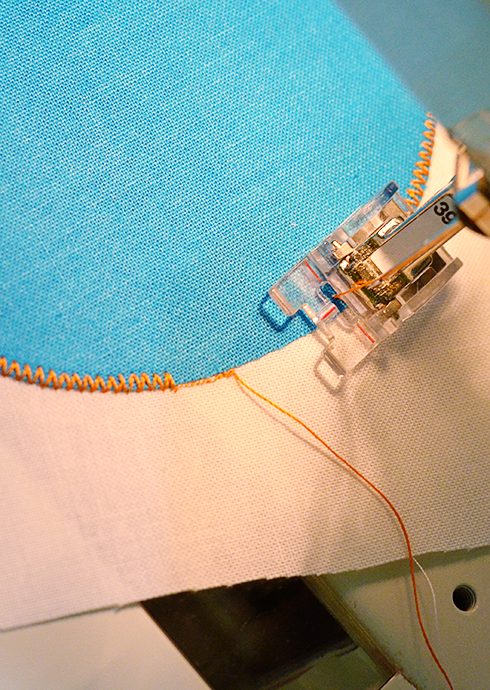
Using a clear presser foot, align your shape right in the middle of your presser foot, so that your needle will sink right at the edge. Take a few very small straight stitches along the edge of the shape. This will help your zig zag (or other decorative stitch) be secure and not unravel. On my machine, I set my stitch length to .5 and took about 5 stitches. I usually start on an inside corner or a straight part if there is one. On circles, you can start wherever you want.
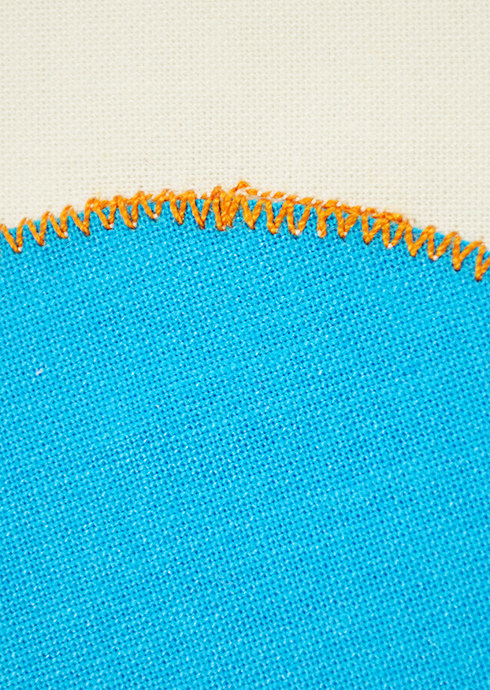
7. Stitch around the shape, using a decorative stitch.
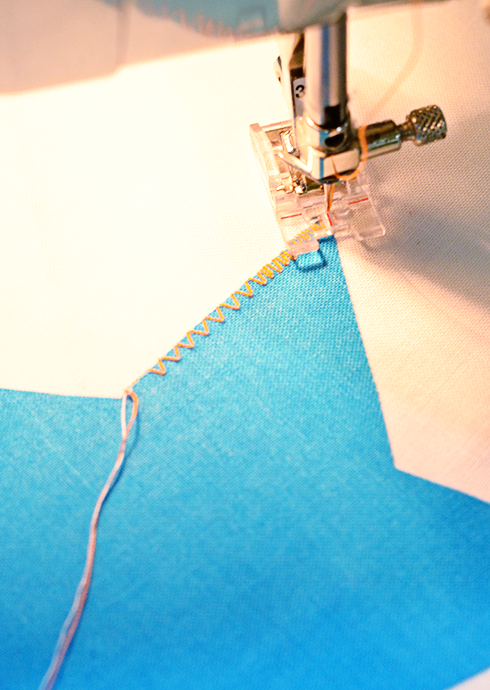
I use a zig zag stitch, because my sewing machine doesn’t have other stitches that work well with applique. If you have a blanket stitch, that’s a fun one too. Align your stitch so that it is all on the shape, just barely coming off the edge of the shape and hitting the background.
8. Drop your needle and pivot at corners.
When you reach a corner, manually place your needle right at the corner, in the background.
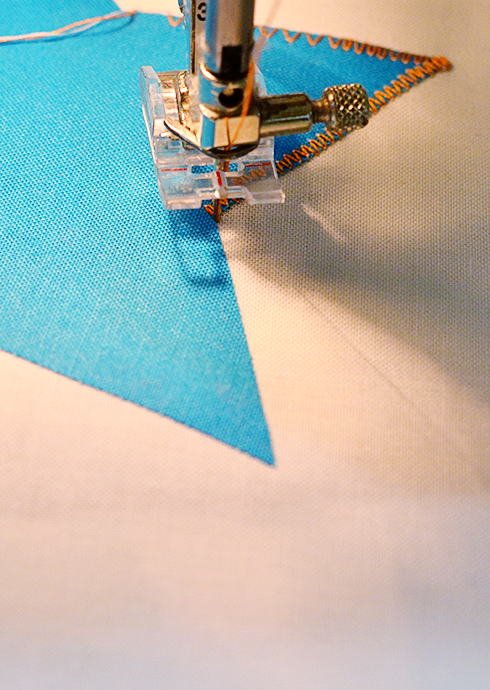
Lift your presser foot, pivot the fabric until it is aligned, then begin stitching again.
9. On circular shapes, pivot continually or use the “clock method”.
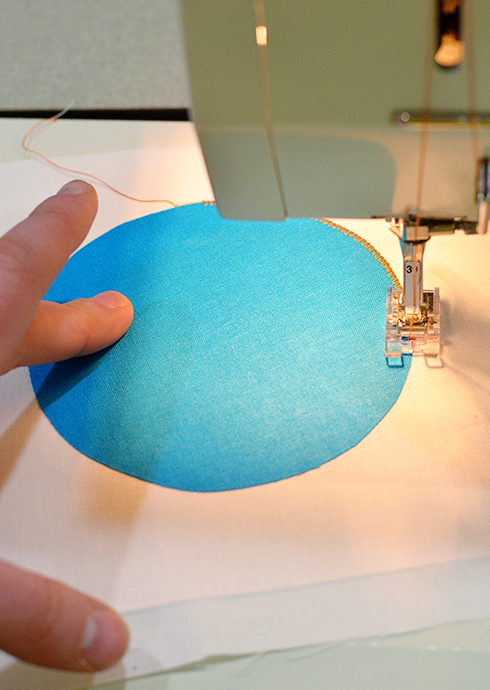
When I am stitching around a circular shape, I use one of two methods. On larger, more gradual curves, I put one finger parallel to the presser foot on the shape and allow that finger to serve as a pivot point. This allows the fabric to move freely and easily around the curve. The keys to this method are practice and allowing the fabric to move freely.
If I am stitching around a smaller or tighter curve, I sink the needle and pivot just like with corners, only moving less with each pivot. The “clock” means to pivot at each place where an hour would be located on the clock. This helps so that your stitching still looks circular like your shape.
10. Finish with a tacking stitch.
Just like when you started, finish by switching to a very small straight stitch and taking 5-6 stitches. This will secure your applique so it doesn’t unravel.
There you have it! 10 steps to perfect machine applique. I hope you’ll try it and see it’s not so scary after all. I’ve included a template you can download and practice with, including marked pivot points on both the star and the circle. Click the link below to open the PDF in a new window.
As I am typing this, I’m wondering if it would be helpful for me to post a video of the circular stitching. What do you think? Do you have other questions? Machine applique tips or suggestions?
xoxo
April
PS Have you made January’s block? Or February’s? (You’re speedy!) I’m going to post a giveaway this month, and one way to get an entry will be to add your block to the flickr group. So far, my block is all alone. :( I’d love to see yours!
I am still not a fan of applique but I will try out your tips again and see how I feel about it after. I haven’t done either blocks but I just bought some fabric and hope to get started this weekend. ;)
Love this… I’m sure I will be able to use your instructions.. thanks
I love these steps, even though I did not use all of them as I didn’t understand some of them, also because I was doing my DT homework and I only needed six steps. However, I am not a huge fan of applique either.
I’ve had occasion to do applique a couple of times recently, and am so glad to find a nice tutorial. Thank you!
Holy cow. You totally make that look fun. I mean it. Wonderful tutorial.
Fantastic! Never done applique before but your tutorial made it so easy for me to learn. I’ll be trying many more creative projects now. Thanks!
Thank you very useful and easy to understand ..looking forward to now putting it use
April, This is a wonderful tutorial. I have never sewed before and just bought my first sewing machine this past Tuesday. My first project is a pillow (Fabric Editions Creative Cuts Bird Silhouette). http://www.fabriceditions.com/shop/product/fun-factor-bird-silhouette-pillow/
I thought it would be an easy beginner project, but then I got to the applique part…..and searched the web and found this. Thanks! I’m still nervous though, but I think your article gave me some confidence. I would love to see the video of you doing the circle. I’ve got a bird and some branches. I’m assuming I put the dogs down (that sounds bad) and freehand it.
Do you use embroidery thread? What presser foot do you use. Thanks for the video.
mcraw36614@aol.com Margaret Crawford
I have a problem with my needle getting sticky from the Heat’n Bond. Also, you didn’t mention what size needle you use. Obviously, I know it depends on the fabric, but I sure do have problems with my needles getting sticky. Otherwise, I enjoyed your tutorial.
Melodie are you sure you are using Heat n Bond LITE. I have never had sticky needle issues with this product. There is another Heat n Bond product that is actually meant for fusing when you don’t want to sew at all. The instructions for that actually say don’t sew over it. Maybe you mistakenly were sold the wrong product by the store? Check the wrapping and if it is the no-sew bonding product, don’t use it. Other times if I have a sticky needle (mostly from machine embroidery stabilizers), I put a blob of oil – either machine oil or Tri-Flow teflon lubricant – on a folded facial tissue, then pierce the tissue with the needle and run the tissue wad up and down the shaft of the needle a few times. If you get the amount of lubricant just right, it will clean the needle but not leave grease on th needle. (The tissue doesn’t need to be saturated – just a drop or two will do the job.) You can give your needle a rub with a non-oily part of the tissue if you want to be sure not to have any grease on the needle before resuming sewing. Cheers, Pam in Australia
I do a lot of embroidery and taking cig lighter fluid on a Kleenex and rub it on the needle workd wonders. No oil residue.
Rubbing alcohol on a tissue or cotton ball will also clean your needle of all stickiness…
Thank you so much for the applique tutorial. Your instructions and photos are superb!
I would love to buy a presser foot like yours. I searched Amazon and eBay for “clear presser foot”, “applique presse foot” and “presser foot guides”, but I have not found a clear one with the guide lines/marks like yours. I bet those little red line are really helpful with lining up the edges of the applique fabric and pivoting. Do you remember where you got yours?
Thanks,
Vicki
I meant “lines”, not “line”. I guess I should start wearing the reading glasses I’m in denial of needing. :-)
Do you drop the dogs before you applique?
I have never attempted to applique` anything until an hour ago but your tutorial made me believe I could do this…lol I followed your directions & I now have a perfectly applique` of the star on my grandaughter’s dress. Thank you so much!!!!
Thank you so much for this tutorial – I found it very helpful and am excited to get started!
I have been searching everwhere for the white fabric with tiny flowers that is featured on the cover of the Spring 2015 edition of Scrap Quilts by Fons and Porter. The quilt is by Emily Bailey. Moda claims that the fabric shown is from the Best Day Ever! collection by April Rosenthal by Prarie Grass Patterns for Moda. I’ve searched the internet and all the fabric stores near and far. I need help! I am willing to pay for the fabric. Just let me know how. Thank you so much.
Carol Lehr, 2056 Valley Rd., El Cajon, CA 92014 619-665-3092, 619 447-3092 Thank You.
holy moly
Thank you for describing appliques so clearly with pictures. I’m curious, do they wash good?
Thanks for the tips, its really helpful
I do lots of applique, use satin stitch and two threads through needle. It’s a tighter stitch and looks smooth. Hope this helps it did for me.
shirley
What is a satin stitch ?
A satin stitch is a zag stitch with the stitch width set at the lowest setting above zero. It is also called a buttonhole stitch.
Yes, would love a video of your circular method! And thanks for your excellent information. Jeanne
Did you drop the dogs or is this just working with zig zag, please. My dogs don’t drop….love this idea. Thank you
My applique came out perfectly, but the whole quilt is quite stiff due to the fusible. Any way to soften it up
Lovely clear tutorial, exactly what I’m looking for. Am going to try this today ??
Very helpful and clear instructions, thank you.
I see you don’t monetize your site, don’t waste your traffic, you can earn additional bucks every month because you’ve got high quality content.
If you want to know how to make extra money, search for: Mertiso’s
tips best adsense alternative
I’m just beginning to machine applique and I want you to know that was one of the best set of directions I have read. Short, simple and to the point. Thank you for sharing! God Bless you and your little one.
April – cute picture of you & the baby! I am interested in the long term washability of machine applique on baby quilts, if done right. I am trying to decide the best way to use my featured fabric (boho elephants in a Valorie Wells print called Jules and Indigo). Due to the spacing of the large elephants in the print, it’s almost impossible to fussy cut them into any regular shape (squares or rectangles even). So a friend has suggested cutting circles and then appliqueing the circles onto background squares… or truly fussy cutting each elephant out and then appliqueing (which may be the most difficult choice!!!) So, just checking in to make sure that if I do machine applique (rather than piecing into regular shapes) the stitching will be good for the frequent washings of a baby quilt!!
I have basically the same questions and also want to know if the quilt will still be pliable/ soft after all the fusible web and appliqué. I would love an answer to this please!!
Loved your tutorial. New at this and I made the mistake of trying the blanket stitch for my first project and it was too hard. Thank you.
Can you do straight stitches for appliqué?
And how you do it?
I also get sticky needle I use steam a seam light.i have been using finger nail polish remover not sure if that is good but it works
I have been trying to find a beginning and ending tutorial for machine Applique. Yours was the ONLY one I could find. So am I right when you set your machine for tacking stitch to start and end you take it off of the zig zag stitch and then just reg stitch? Sometimes I’m really dense when it comes to this. I do appreciate your tutorial!
Thank you !!! You have just shown me where I went wrong in applying a shape – I overlapped the zigzag stitch too far onto the foundation fabric causing it too ruckle under the zigzag satin stitch. looks awful ! I might even unpick it now, couldn’t face doing that before…
Thanks for the tips. I’m going to try an applique table runner. Did you ever make a video of the circle technique?
Absolutely wonderful instruction! THANK YOU!
I, too, would like to know if a baby quilt will be soft and pliable with the addition of fusible webbing and appliqué.
Thank you for your help, April.
April,
Yes, I would VERY MUCH appreciate a video of you applying the appliqué and sewing it on the curve.
Next step
j’aimerai savoir si le pied de biche pour réaliser les appliques est conçue pour toute les machines à coudre, et en trouver; je suis de Belgique et j’ai une Bernina.
Merci,à bientôt