Don’t go running and screaming away, I promise this will be quick and painless. And for those of you who haven’t done much with applique, or machine applique, you’ll see this isn’t anything to be afraid of.
Here’s the thing about machine applique: with the right tools and techniques, it can be really, really easy. And if you’re one of those people that just cringe at the word applique, well, you’re not alone. I have a couple friends and family members that are right there with you. But I promise–it doesn’t have to be traumatizing. Lets do it. Here are 10 steps to perfect machine applique.
1. Start with a template
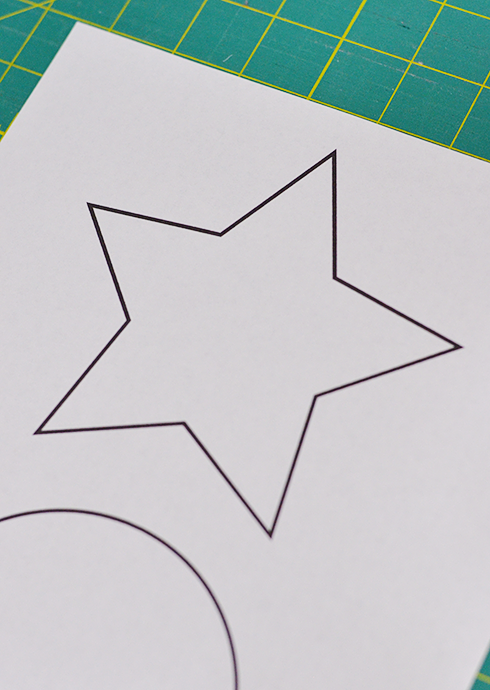
Unless you’re really, really good at freehanding it, it’s easier to trace a shape. Also, with this technique, if you want to applique letters, you’ll want the letter to go backwards on the template.

Trace the template on to the paper side of some fuseable webbing. Usually, I use Heat ‘n Bond lite, but I also really like featherweight–it doesn’t make the finished product stiff at all.
2. Cut around your shape, leaving some space around the line. Iron to fabric.
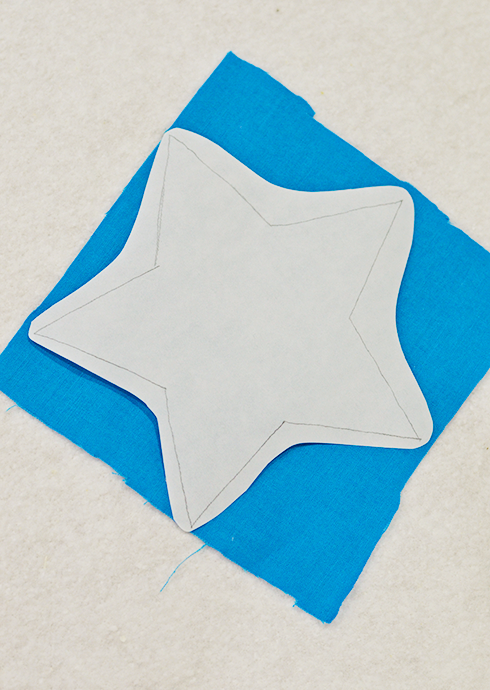
Place the paper shape shiny side down on the wrong side of your fabric.

Adhere the paper shape to the fabric according to manufacturer’s instructions. In my case, I used the “silk” setting on my iron for 2 seconds.
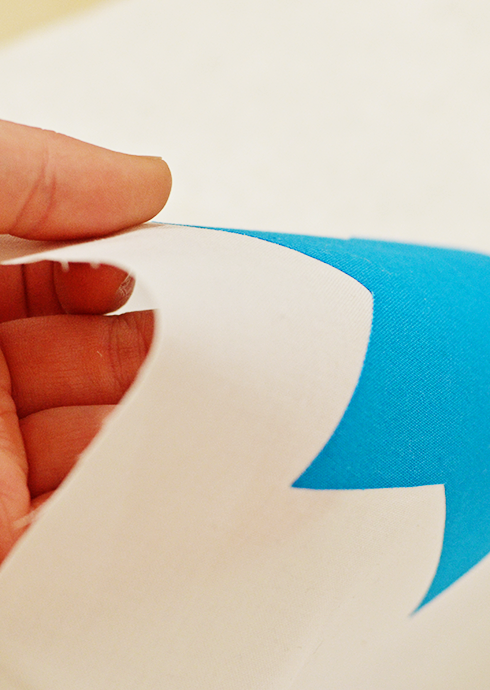
3. Cut out the shape on the line.

Peel the paper off the back of the fabric.
4. Iron the shape to background fabric, according to manufacturer’s instructions.
In my case, I used the silk, no steam setting for 10 seconds. Be sure not to keep your iron there too long, you run the risk of scorching the fabric or making the webbing not adhere as well. The shape should be stuck to the background well enough that it doesn’t lift or shift if gently manipulated.
5. Choose your thread.
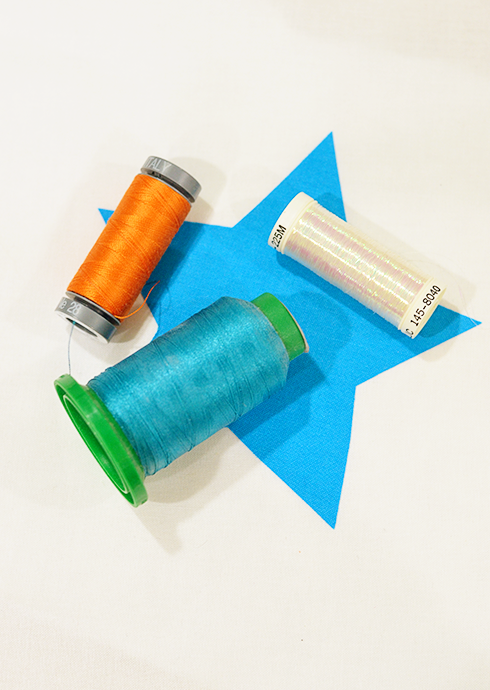
You have lots of choices when it comes to thread. I have used metallic, iridescent, matching, contrasting, even invisible thread. If you’re just beginning, I suggest using a thread that matches your shape. As you gain skill and confidence, you can move on to other threads–which can add a LOT of fun and visual interest to your project.
6. Start with a tacking stitch.
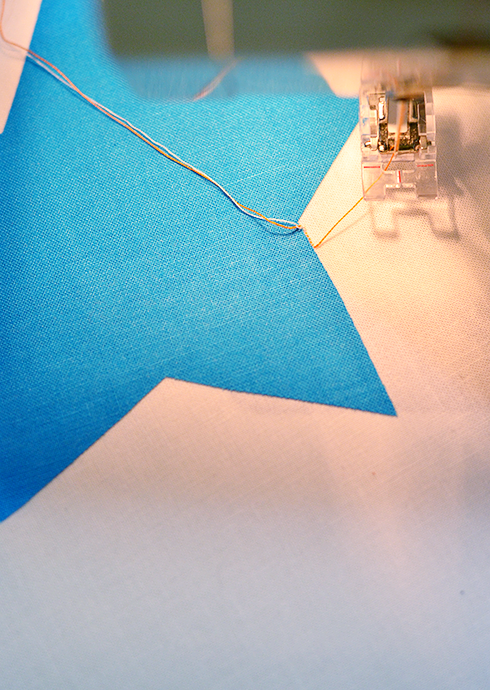
Using a clear presser foot, align your shape right in the middle of your presser foot, so that your needle will sink right at the edge. Take a few very small straight stitches along the edge of the shape. This will help your zig zag (or other decorative stitch) be secure and not unravel. On my machine, I set my stitch length to .5 and took about 5 stitches. I usually start on an inside corner or a straight part if there is one. On circles, you can start wherever you want.
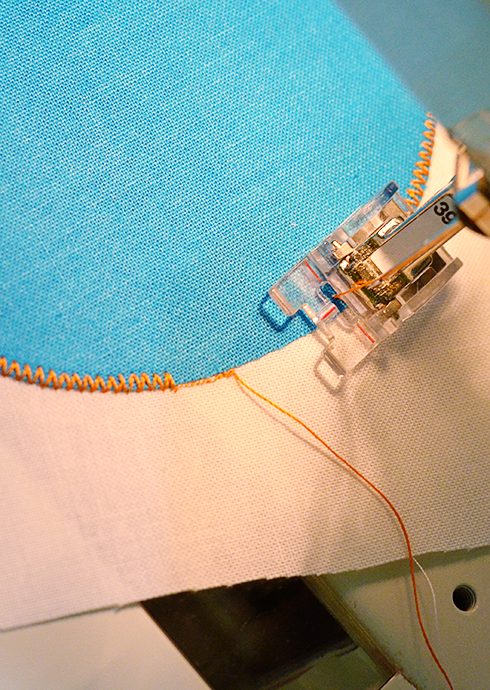
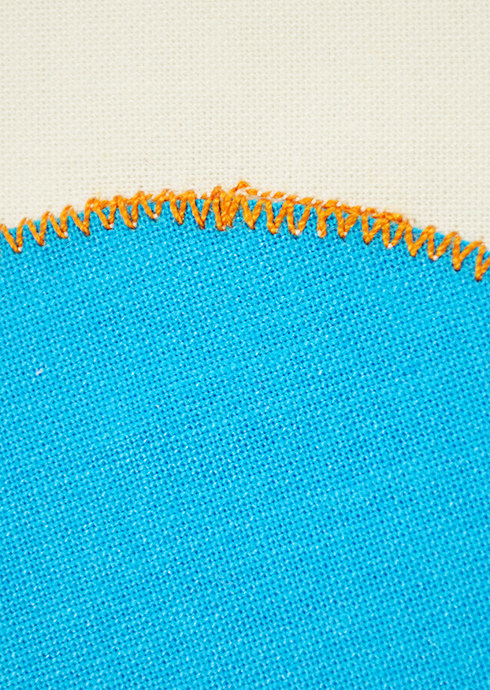
7. Stitch around the shape, using a decorative stitch.
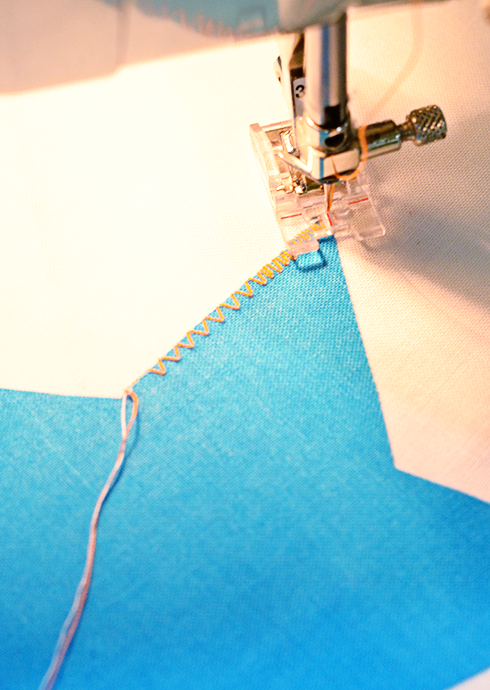
I use a zig zag stitch, because my sewing machine doesn’t have other stitches that work well with applique. If you have a blanket stitch, that’s a fun one too. Align your stitch so that it is all on the shape, just barely coming off the edge of the shape and hitting the background.
8. Drop your needle and pivot at corners.
When you reach a corner, manually place your needle right at the corner, in the background.
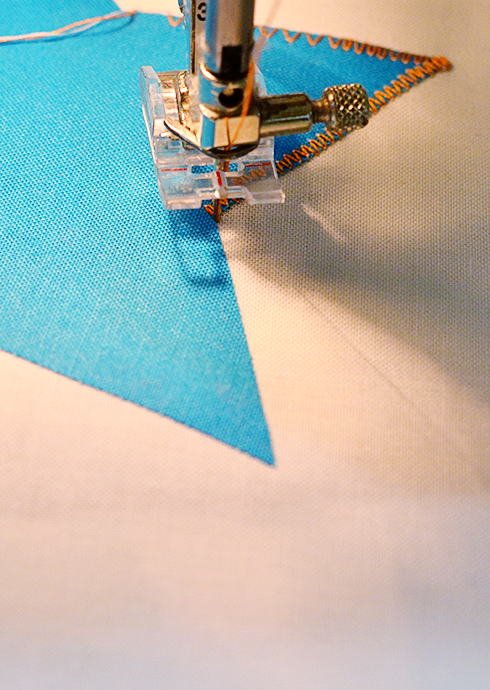
Lift your presser foot, pivot the fabric until it is aligned, then begin stitching again.
9. On circular shapes, pivot continually or use the “clock method”.
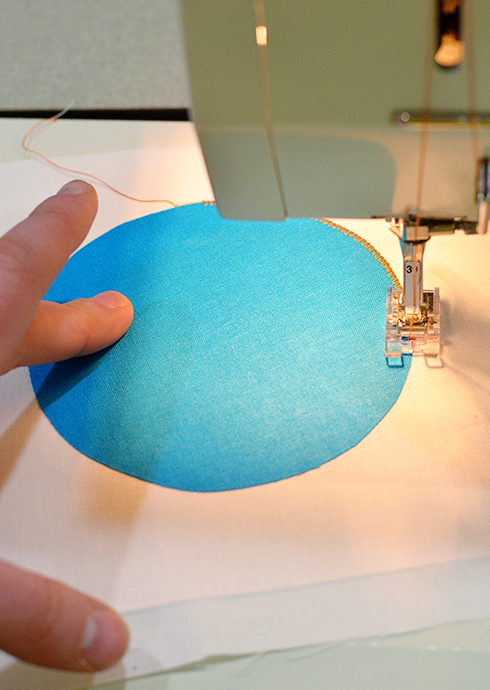
When I am stitching around a circular shape, I use one of two methods. On larger, more gradual curves, I put one finger parallel to the presser foot on the shape and allow that finger to serve as a pivot point. This allows the fabric to move freely and easily around the curve. The keys to this method are practice and allowing the fabric to move freely.
If I am stitching around a smaller or tighter curve, I sink the needle and pivot just like with corners, only moving less with each pivot. The “clock” means to pivot at each place where an hour would be located on the clock. This helps so that your stitching still looks circular like your shape.
10. Finish with a tacking stitch.
Just like when you started, finish by switching to a very small straight stitch and taking 5-6 stitches. This will secure your applique so it doesn’t unravel.
There you have it! 10 steps to perfect machine applique. I hope you’ll try it and see it’s not so scary after all. I’ve included a template you can download and practice with, including marked pivot points on both the star and the circle. Click the link below to open the PDF in a new window.
Machine Applique Template
As I am typing this, I’m wondering if it would be helpful for me to post a video of the circular stitching. What do you think? Do you have other questions? Machine applique tips or suggestions?
xoxo
April
PS Have you made January’s block? Or February’s? (You’re speedy!) I’m going to post a giveaway this month, and one way to get an entry will be to add your block to the flickr group. So far, my block is all alone. :( I’d love to see yours!

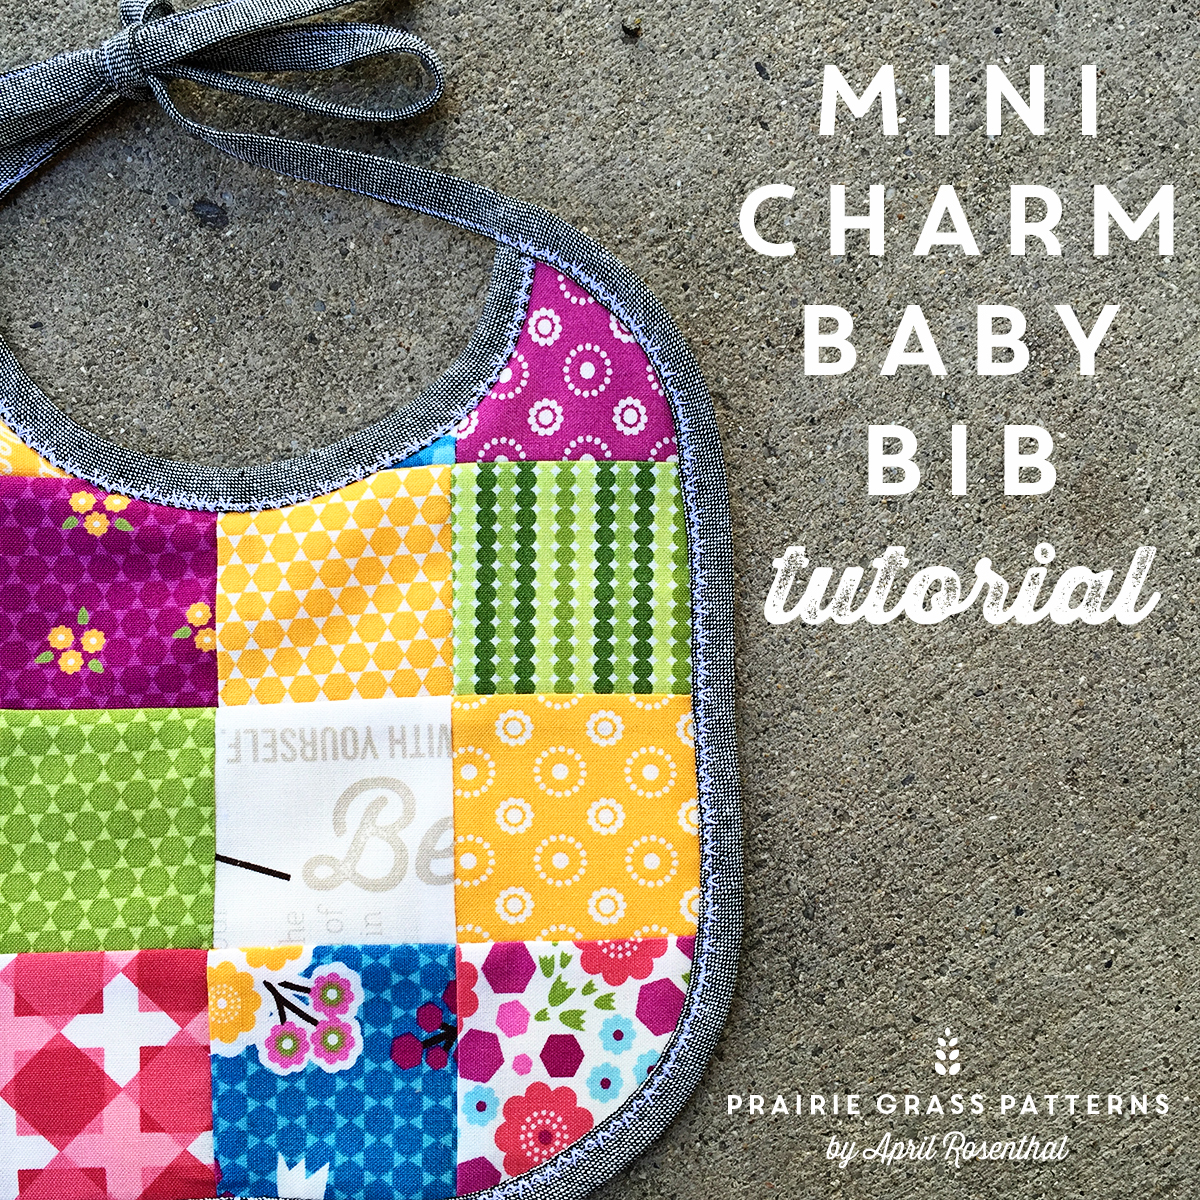
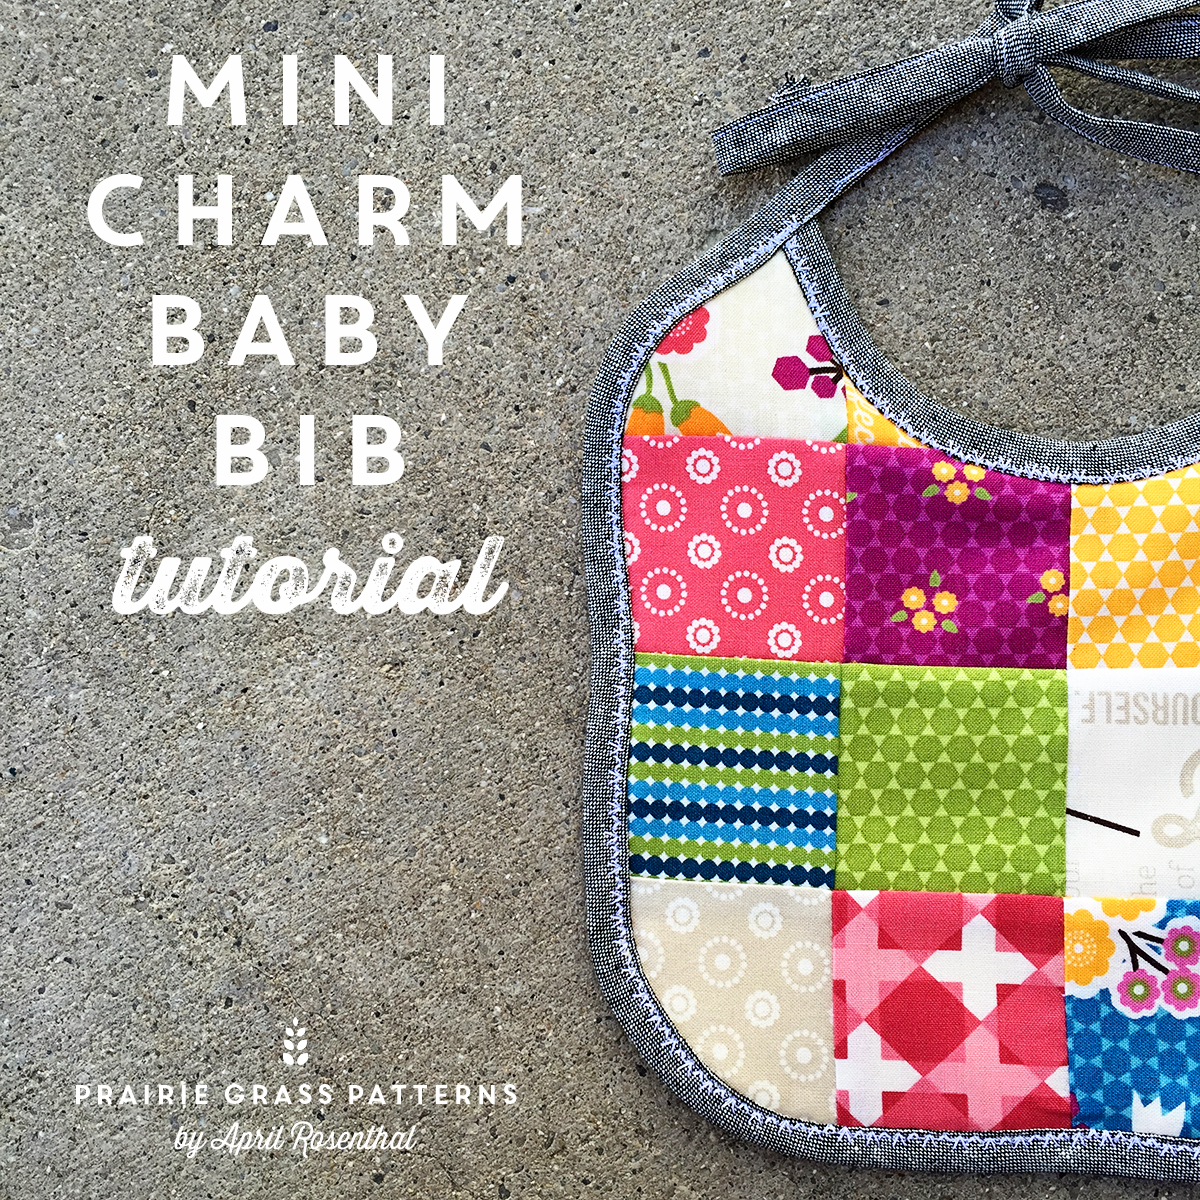 So simple, you’re going to want to make about a billion of them,
 and give a few to each new baby you meet.
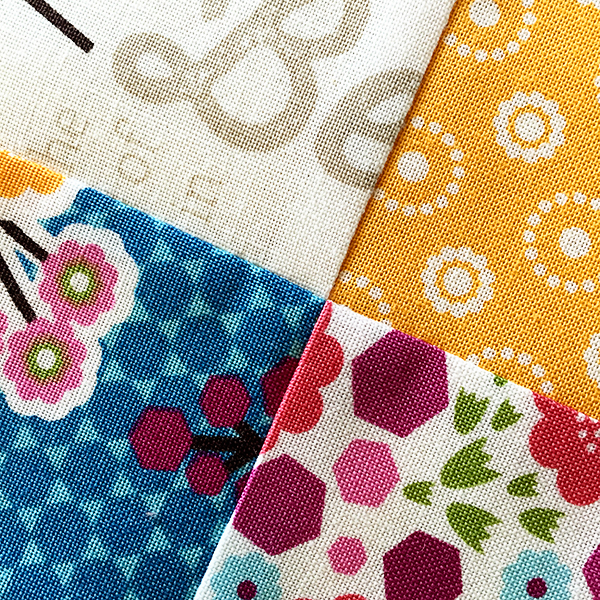 It’s a fun quick project,
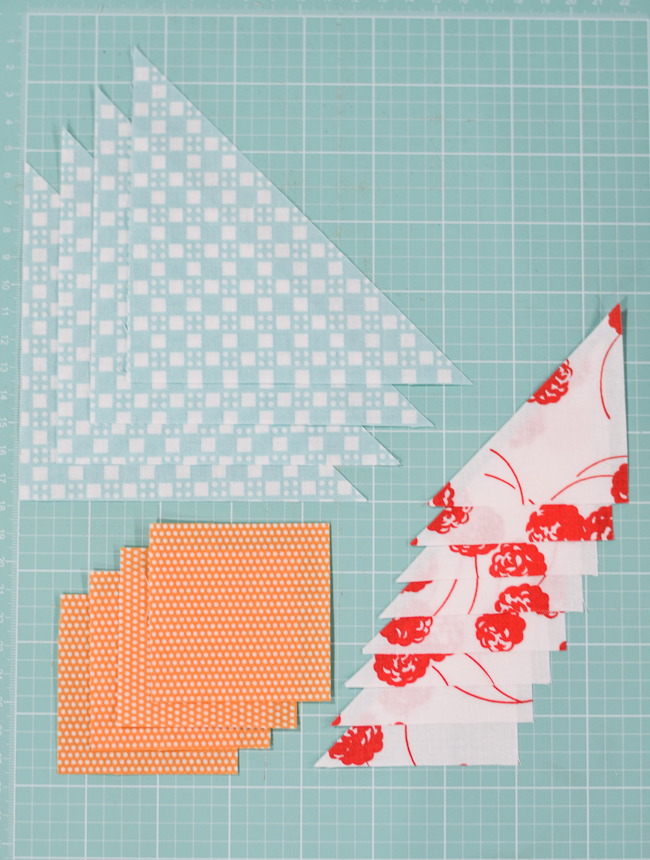
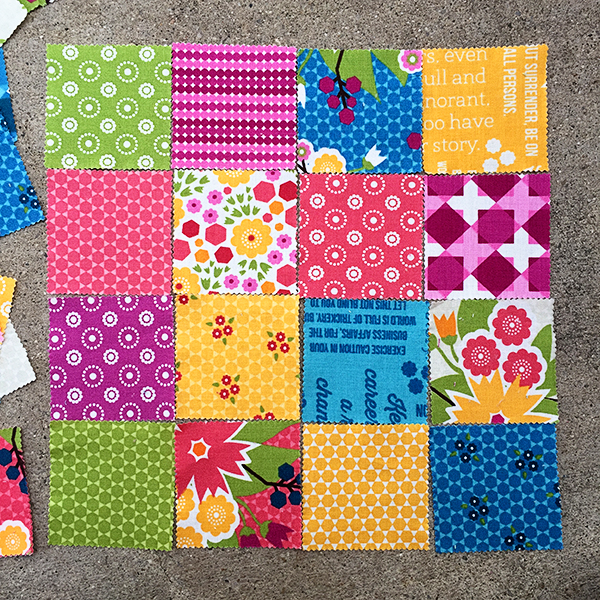 Lay out 16 mini charm squares, in rows of 4.
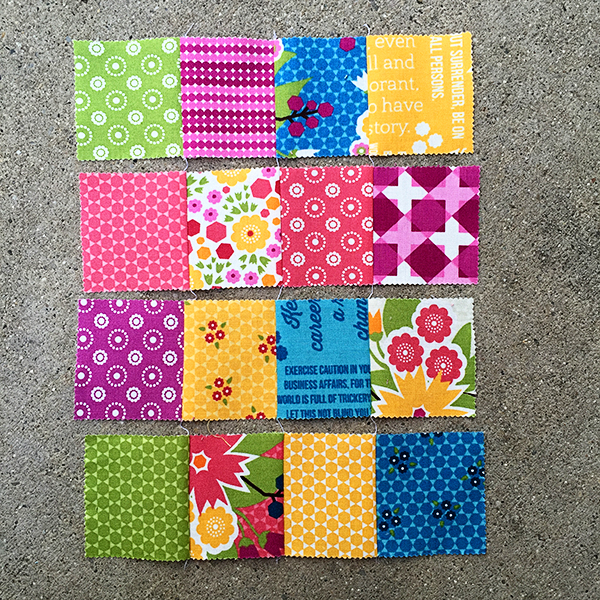 Stitch those rows together, press seams in alternating directions by row. (AKA, 1st and 3rd rows press to the left, 2nd and 4th? Press to the right.)
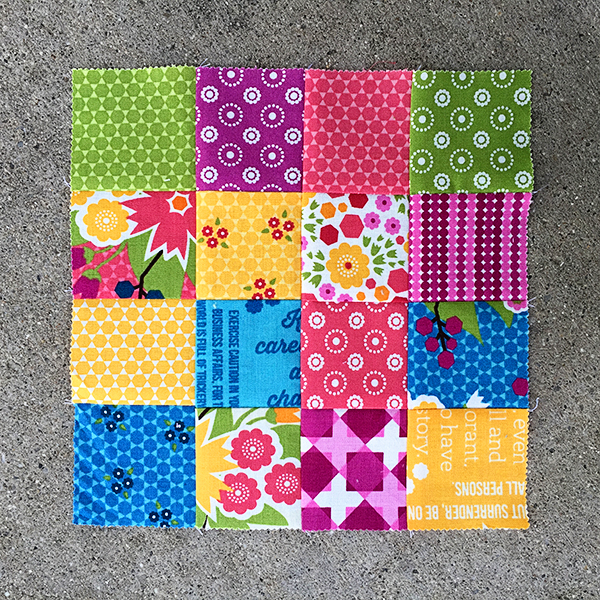 Stitch rows together. Press seams to one side.
 Lay patchwork on top of a microfiber or terry washcloth. (I got a pack of 8 at my local grocery store for under $5) Only, center it on the washcloth…I just put mine like this so you could see both parts.
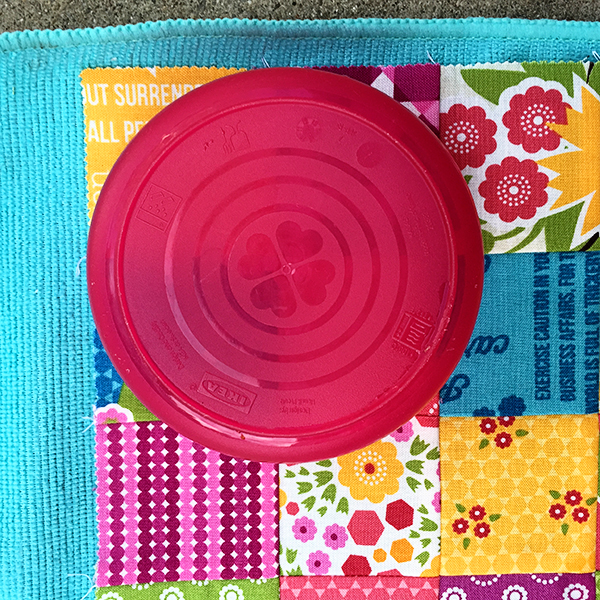 Use a small bowl or large cup to mark rounded edges,
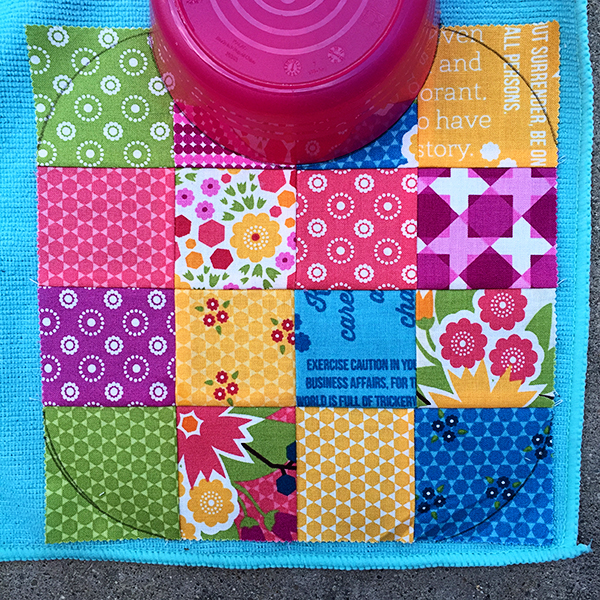 and a neck hole.
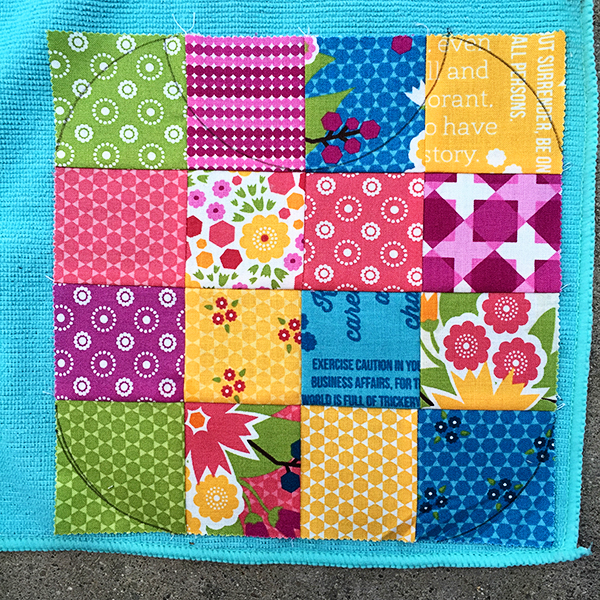 Set bowl aside.
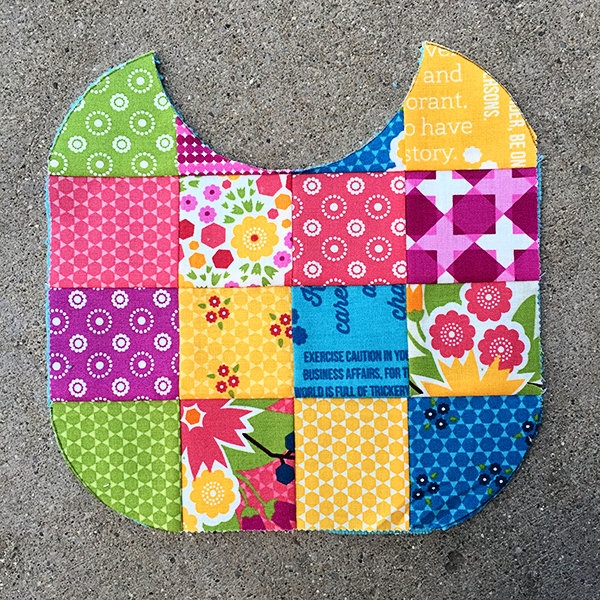 Cut on lines.
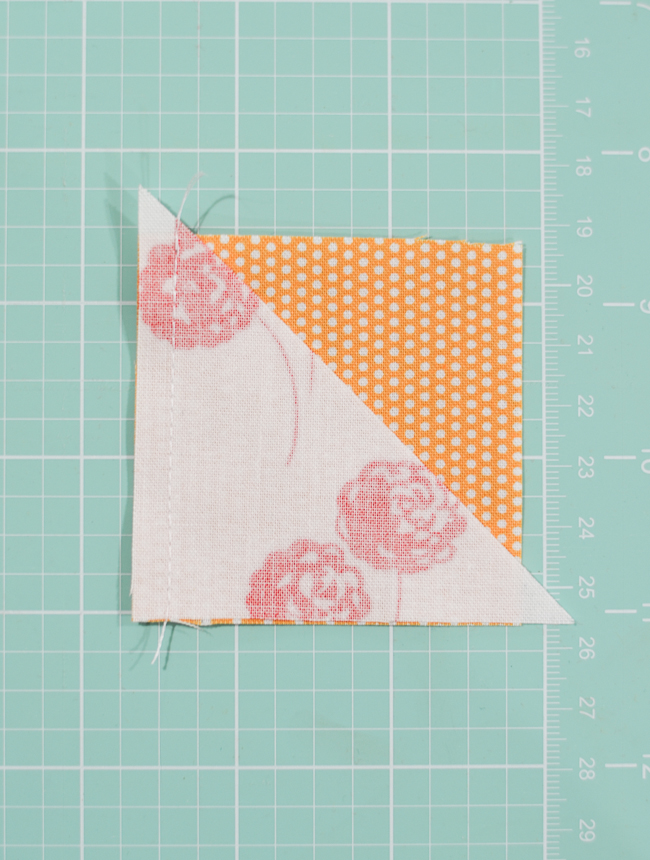
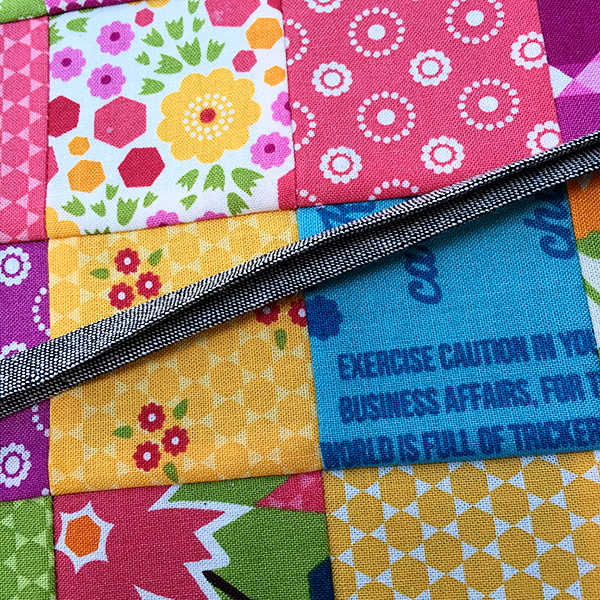 Get 1 yard bias tape.
 (Bias tape can be purchased in packages, or made. I made this by cutting bias binding at 1 1/2″ and then pressing both edges to the center, and pressing in half.)
 Place bias tape along neck edge. you can pin in place, or use a glue stick. Stitch down, making sure you catch the edge on the backside. For this reason, I chose to use a decorative stitch, it’s a little wider. Trim bias tape at the edge of the bib.
 Place (pin or glue stick) bias tape along the remaining raw edge of the bib, leaving an equal amount of “tie” on each side. You can either fold the end edge under, or tie a knot in each side, an inch or so from the end. :)
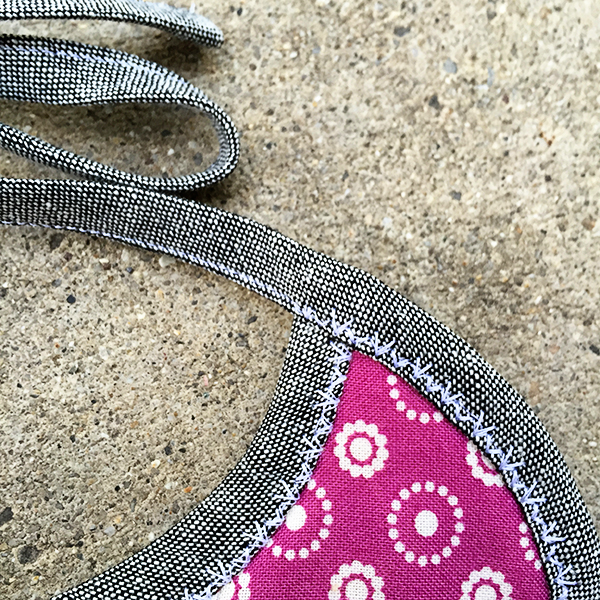 Stitch down.